


Adaptive Skiing - Alpine/Downhill
Share
About
The first thing you need to do to learn how to ski is to locate a program in your area. Move United has chapters with adaptive ski programs nationwide. Visit our Locations page and search for an adaptive skiing program near you. If there isn’t a chapter in your area, call the nearest ski site and ask if they have an adaptive program.
Once you’ve located an adaptive program, call and ask questions about any physical concerns you might have, the accessibility of the ski area, and the type of adaptive skiing available to you based on your disability. Tell them you have never been on skis before. Don’t be shy. Adaptive ski instruction is just that – teaching you how to ski.
When you call to book a lesson, the person taking the information should explain the registration process, tell you if you need to fill out forms in advance, and give you the cost* and length of lesson. If not, then be sure to ask so you will have no surprises once you get to the ski hill.
As with any high level of activity, the night before get your rest and be sure to drink plenty of fluids. Amputees and others with disabilities sometimes have other health conditions. Make sure you don’t vary from what your doctor prescribes in terms of medicine, hydration, and nutrition.
*Many programs have scholarships to assist those in need of financial aid.
Your first lesson
- When arriving for your first lesson, wear layers of non-cotton winter clothes and use sunblock. Bring a water bottle, a snack, and a positive attitude!
- Arrive 30 minutes early so that you can fill out the registration paperwork and sign forms.
- Call the ski school if you are going to be late.
- You will meet your instructors and there will be an assessment during which they will ask you about your mobility level and watch you move, other sports you may do, your strength, flexibility, areas of weakness and endurance in order to match you with the best equipment. You will set goals for your
- lesson that match your desires and what the instructor knows about the area and conditions of the day.
- You will be required to wear a helmet during your lesson.
- Your lesson will start on the flat snow with skills and drills.
- Lessons typically last from 1.5-3 hours.
- Parents or caregivers will be given a time to meet back following the lesson.
- You’re a beginner, so don’t be embarrassed if you don’t get the hang of it right away or need to be shown something again. It’s OK to ask questions.
- Have fun!
Methods of Adaptive Skiing
Depending on your level of disability, there are several ways you can ski using different types of adaptive equipment.
Four-track adaptive skiing is an ideal technique for persons with a wide variety of disabilities, including double amputees, spina bifida, cerebral palsy, muscular dystrophy, multiple sclerosis, stroke, head trauma, paraplegia, and polio. An individual with two legs and arms, natural or prosthetic, who is capable of standing independently or with the aid of outriggers, could ski four-track using two skis with two hand-held outriggers for balance/support, giving the skier four points of contact with the snow. Outriggers are metal forearm crutches with ski tips on the ends, some having adjustable brakes to aid with balance if necessary.
In addition to outriggers, ski stabilizers or tip clamps (ski bras) are used for lateral stability if needed. A tip clamp can also allow a student’s strong side to help control the weaker side. The design of tip clamps allows the skis to stay in a wedge or parallel position while skiing.
The snow slider is another form of four-track skiing for those with more severe balance issues. Skis are mounted to the metal frame making it something like a walker with skis. The skier uses their own boots and skis, and is aided by instructors on either side.
Three-track skiing is stand-up skiing using one full-size ski and two handheld outriggers for balance/support, giving the skier three points of contact with the snow. Individuals with above-knee amputations and single limb weakness typically use this method of skiing. It also can be suitable for those with cerebral palsy, muscular dystrophy, multiple sclerosis, post-polio syndrome, arthritis, spina bifida, spinal cord injury, and traumatic brain injury. Three-track skiing requires strong leg and arm strength and may not be for those who have weakness in their remaining limbs.
Two-track skiing is suitable for any skier who stands on two skis and does not require outriggers. The skier can stand and maintain balance while in motion, although adaptive equipment (tethers, spacers, ski bras, etc.) may be used to aid in leg strength. Two track skiing is best suited to students with developmental and cognitive disabilities, mild cerebral palsy, visual impairment, hearing impairment, traumatic brain injury, Fragile X Syndrome, epilepsy, Friedreich’s Ataxia, Autism Spectrum Disorder, Asperger Syndrome, and spina bifida.
There are many below-knee amputees who can ski using the two-track methods thanks to advancements in prosthetics (carbon fiber, durable systems and sockets, improved suspension) that make it possible. However, not every prosthetic knee can withstand the forces of alpine skiing, so a skier should consult with their prosthetist first to determine the best type of components for their intended activity.
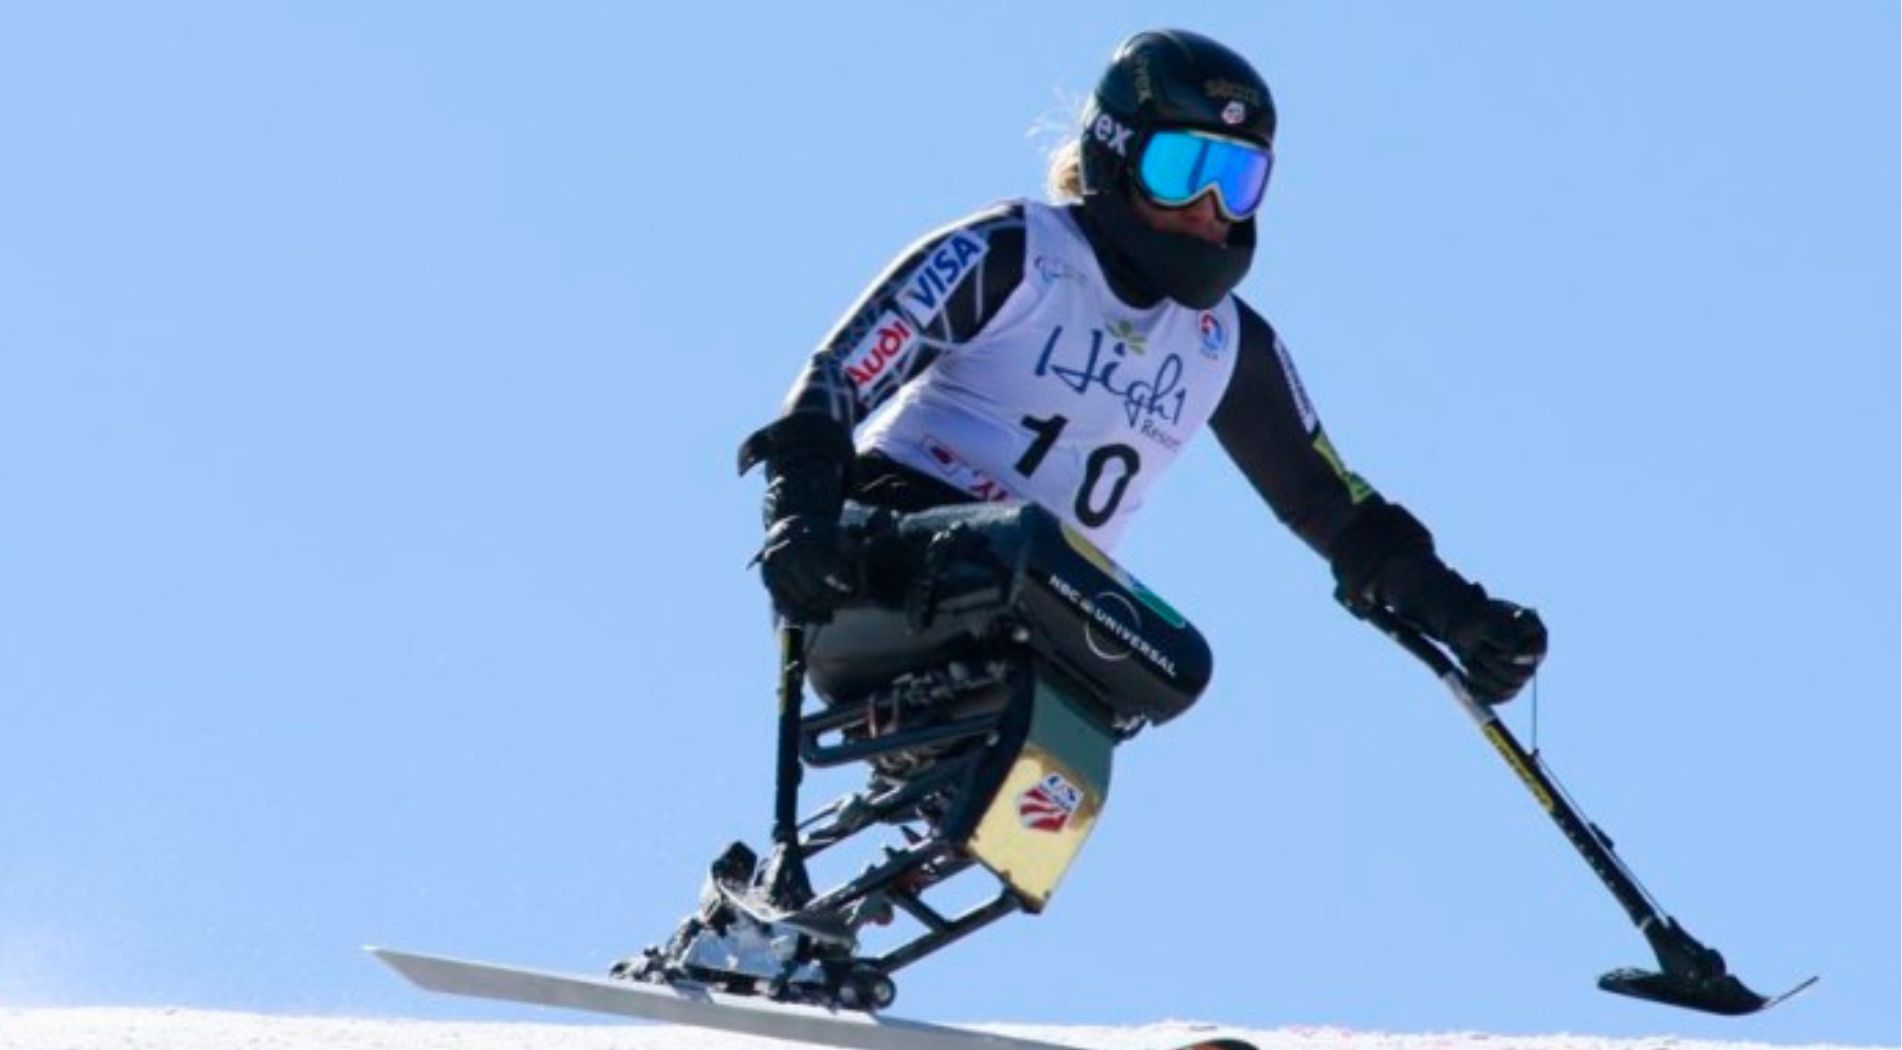
Mono-ski and bi-ski: Anyone who cannot ski standing can use a technique called sit-skiing, using a mono-ski or a bi-ski.
Mono-skiing utilizes a bucket style seat with a single ski underneath it. An individual uses handheld outriggers for balance, requiring strong arms and good core strength and trunk balance. Individuals who have lower limb impairments and reasonable trunk stability and balance use mono-skis. Those with brain trauma, post-polio syndrome, muscular dystrophy, cerebral palsy, multiple sclerosis, spina bifida, spinal cord injuries and double amputees are good candidates for mono-skiing.
Bi-skiing utilizes a bucket style seat with two skis underneath it. The bi-ski is designed for those who use a wheelchair or have difficulty walking even when assisted by crutches, canes or walkers. The typical candidate for the bi-ski would be an individual with a mid- to high-level spinal cord injury, cerebral palsy, multiple sclerosis, spina bifida, muscular dystrophy, amputees, or other severe balance impairments.
A bi-ski can be skied independently like a mono-ski using the same type of handheld outriggers or can be skied with the assistance of an instructor using fixed outriggers and tethers (reins attached to the back of the bi-ski). Skiers turn by either moving their head and shoulders or by using handheld outriggers. A bi-ski can be a choice for a new sit-down skier before moving on to the mono-ski, depending on the shared goals of the skier and instructor.
Visual Impairment (VI) is not a barrier to fun on the slopes. Skiers learn to ski with the assistance of a specifically trained guide. For first-time VI skiers, the guide skis first, but facing backwards to the student; students with peripheral vision can be guided from the side. A guide can also call out instructions from behind the skier. The key is for the student and guide to determine the best method of communication before the lessons begin.
Competition
Skiers interested in how their times have improved as they become more skilled, can utilize NASTAR (National Standard Race), available at almost every major ski area. Through computer tracking, NASTAR allows ski or snowboard racers of all ages and abilities to check and compare their times. NASTAR courses are simple, open-gated giant slalom on mostly intermediate terrain, allowing skiers of all abilities and ages to experience racing.
Adaptive Ski Racing
Ski racers who become proficient and want to further challenge themselves and improve their skills can move on to Level II races (called IPCAS races), which are sanctioned by the United States Ski and Snowboard Association (USSA) and the International Paralympic Committee (IPC). In Level II, skiers are competing against their peers and a point system called IPCAS points, which starts at 990 points. Points carry over from one season to the next inside a 15-month period. As a racer’s skill level increases, that racer’s points will decrease. Lower points reflect better race results. Skiers must also have a competitor’s license from the USSA and the IPC and have a disability classification (see Classification sidebar, page 22). For details on IPC licensing, learn more at Team USA.
The U.S. Adaptive Team is selected every spring based on their IPCAS points from Level II races from each year. If a racer is selected to be on the team, then international competition begins with the ultimate goal to be in the Paralympics.
Equipment
Ski equipment also is different at the higher levels of racing. At the entry level, skis are the same as in recreational skiing. But as skiers advance, upgrades to racing skis which have certain dimensions, are essential. Check the IPC list of equipment requirements for sanctioned races.
Click here for adaptive skiing equipment suppliers.
Learn More
Once you’ve decided that serious competition is what you want to do, then get involved with a full-time program, whether it’s a Move United Member Organization, or a ski school. “In the western United States there are some great programs including Alpine Meadows, Mammoth, Disabled Sports Eastern Sierra, Kirkwood, National Ability Center (NAC), National Sports Center for the Disabled (NSCD), Aspen Valley Ski Club and Team Summit in Copper Mountain,” Watkins said.
Adaptive competition training is based on the same teaching principals used for any standard competitive ski racing organization. It involves on-snow training, gate training and dryland cross training that includes biking, aerobics, and weightlifting to keep your muscles strong and flexible.
“A normal day of training begins with warm ups, drills and exercises,” Watkins said. “Then on the hill, where the coach has set up a course for you to ski. The coach will often shoot a video of your technique. After lunch, the video is shown, and the coach will critique you. The day ends with light aerobic activity and core work to flush the lactic acid from their system so they are ready to go to work the next day.”
As with any sport, the amount of time commitment will depend on your level of dedication. At a minimum, recreational ski racers spend most weekends in the winter training and competing. As you develop in the sport, you may find yourself taking time off from school or work to attend training camps or traveling to races away from your home ski area. Members of the U.S. team spend at least 100 days a year on snow, including off-season training overseas.
Adaptive Skiing Off Season Training
When it comes to off-season training, Watkins said he advises his athletes to keep it simple. “I don’t care what you do, just do it an hour a day – cycling, swimming, rock climbing, water skiing, or whatever activity you enjoy and has you moving. At the National Ability Center, we do mini camps the last 15 days of the season, working on the basics, the fundaments of being a good skier – not a racer, but a good skier. The other part of summer training is spending at least one to two weeks at Mount Hood. That is where we find some of the biggest gains in technique during the off-season.”
If You Love It, Do It: “There is nothing you can’t do if you love it,” Watkins said. “Don’t allow anyone to tell you that you can’t do something. Cardio, weight training, core training, can be taught and learned but the desire is the biggest thing to be an elite racer. You can learn everything else, but remember everybody starts somewhere. Everybody that steps up to the Paralympic podium started the same way.”
NATIONAL SKI AREAS ASSOCIATION (NSAA) SAFETY TIPS
Common Sense, it’s one of the most important things to keep in mind and practice when on the slopes. The National Ski Areas Association (NSAA) believes education, helmet use, respect and common sense are very important when cruising down the mountain. NSAA developed Your Responsibility Code to help skiers and boarders be aware that there are elements of risk in snow sports that common sense and personal awareness can help reduce.
SEVEN POINTS TO YOUR RESPONSIBILITY CODE
- Always stay in control, and be able to stop or avoid other people or objects.
- People ahead of you have the right of way. It is your responsibility to avoid them.
- You must not stop where you obstruct a trail, or are not visible from above.
- Whenever starting downhill or merging into a trail, look uphill and yield to others.
- Always use devices to help prevent runaway equipment.
- Observe all posted signs and warnings. Keep off closed trails and out of closed areas.
- Prior to using any lift, you must have the knowledge and ability to load, ride and unload safely.
For more information find “Safety Tips” at the NSAA.
Check out the article on alpine skiing in the Winter 2018 issue of Challenge Magazine here.
Programs Near You
Ready to try adaptive skiing? Click here to find an adaptive ski program near you!